

Securing Cloudflare Tunnels the easy way
Introduction
In my previous post, we walked through setting up a Cloudflare tunnel to access a local Speedtest tracker Docker container. Now that we have established access, it's important to consider security measures.
Let's continue using the Speedtest tracker as an example, but imagine that this data is sensitive, such as a remote admin interface. We wouldn't want this information to be accessible to just anyone, so the focus of this article is to guide you through enabling authentication for our Speedtest tracker (or any application you have setup).
 Mint
Mint
Next, we'll utilise Cloudflare's Zero Trust Applications and Policies to add an extra layer of security and safeguard our sensitive data, providing increased peace of mind.
To get started we need have the following;
- Domain name registered within Cloudflare
- An active tunnel setup
- At least 1 public hostname setup under the tunnel
Please refer to the previous article above for information on the above!
Cloudflare Access
A brief analogy; So, we've built a secret tunnel to our application. That's great! But right now, anyone who finds the tunnel entrance could potentially walk right in. Cloudflare Access is like putting a locked door at the entrance of that tunnel. Instead of everyone having the key, Access checks who's knocking and only opens the door for people you've approved. It uses things you already use to log in (like your Google account) to make sure it's really you. This way, only the right people can get to your applications through the tunnel.
Now we need to head over to Zero Trust and setup a policy along with an application.
Policies
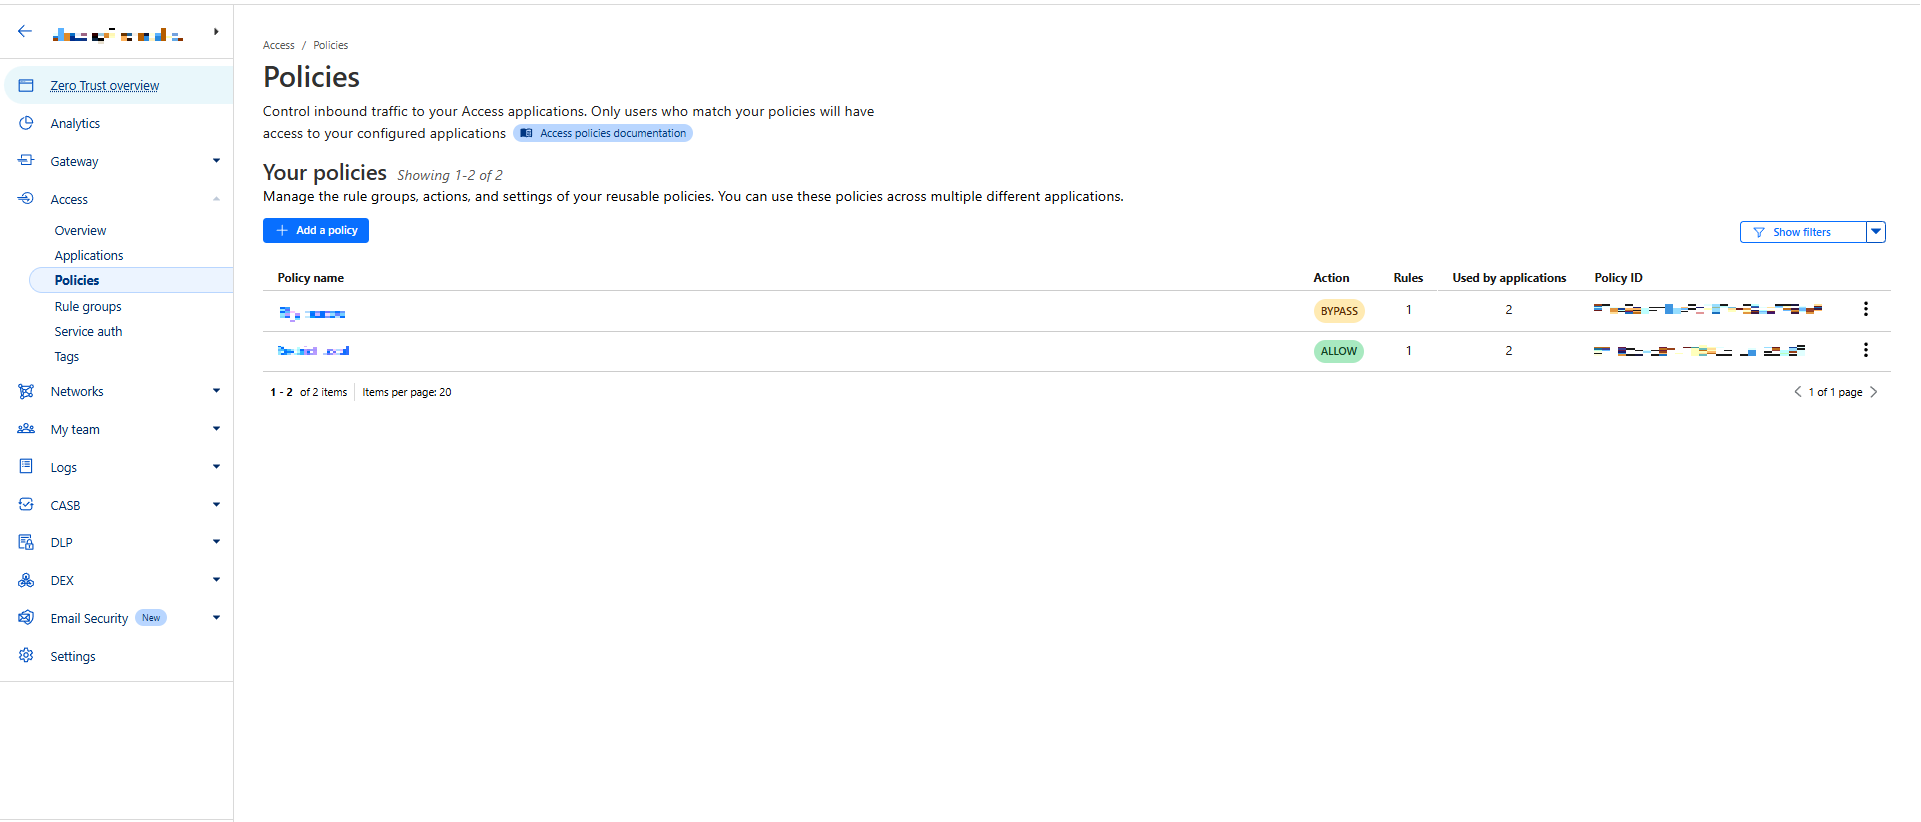
- In Zero Trust, go to Access > Policies.
- Select Add a policy.
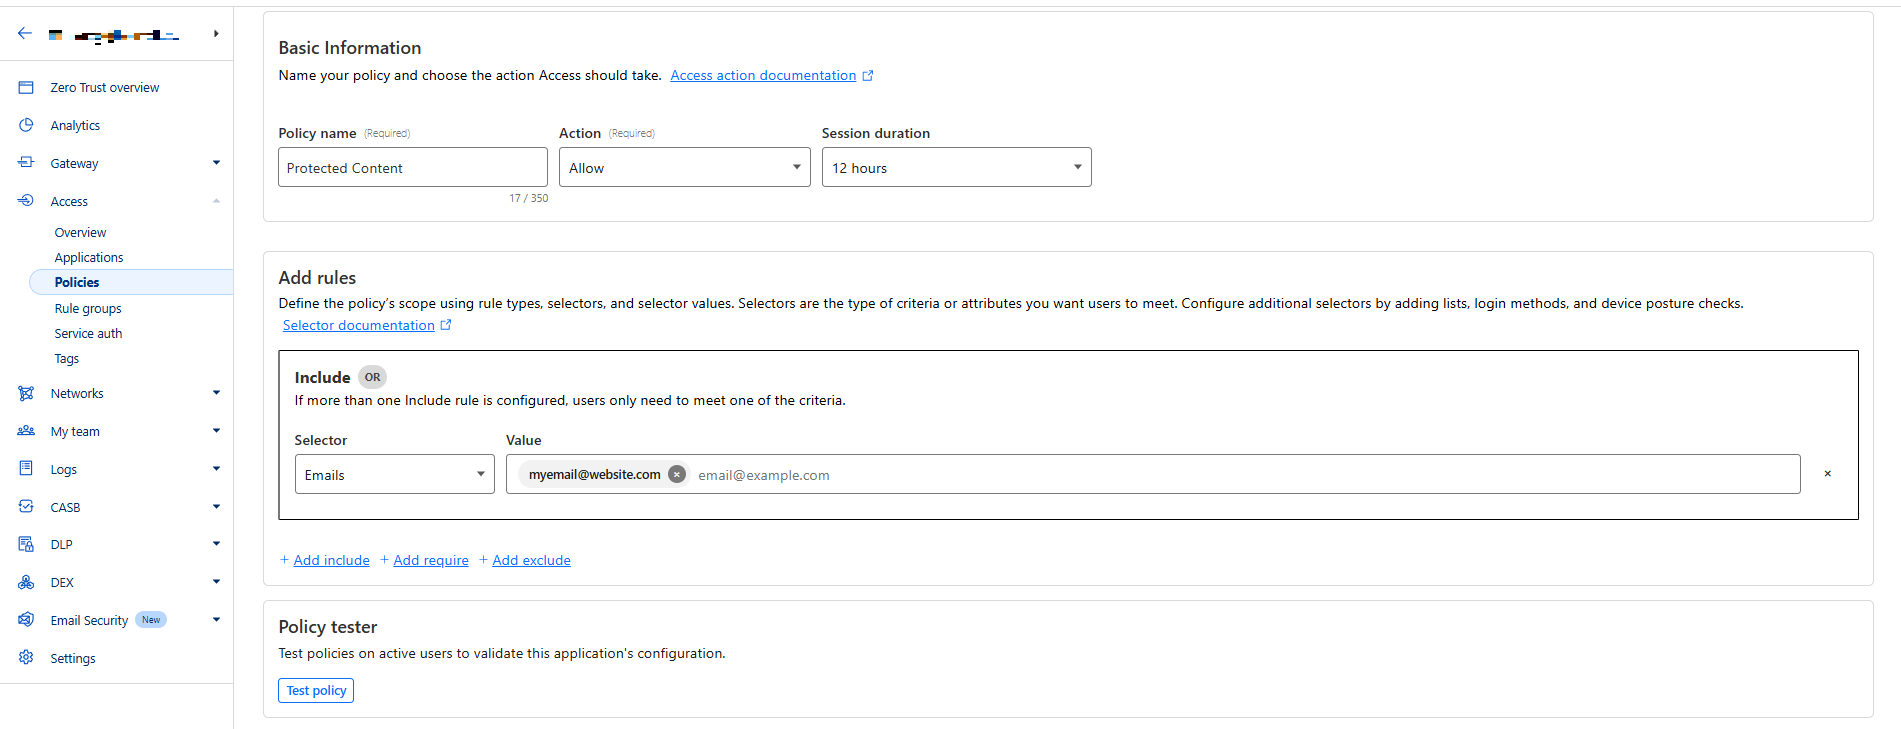
- Enter a Policy name (we'll use 'Protected Content')
- Ensure Action is set to allow
- Choose a time for Session Duration (this will be how long a user has access once authenticated)
- In the Add Rules section select Emails then type your email into the Value box (ensure you press enter for the value to be captured)
- Select Save
Applications
Now that we have our access policy in place, we can
- Within Zero Trust Open Access
- Select Applications and select Add an application
- Select 'Self-hosted' as the type
- Enter an application name e.g. 'Restricted Access'
- Set a session duration (I use 12 hours)
- Select Add public hostname
- Now we'll enter speed as the subdomain and select our domain mywebsite.com (if you used a path in your tunnels ensure you mirror the path also)
- Under Access Policies select Select existing policies then choose 'Protected Content' (or whatever you named your policy) and select Confirm
- Select Next through (Experience settings and advanced settings which we're not going to cover in this article) and select Save
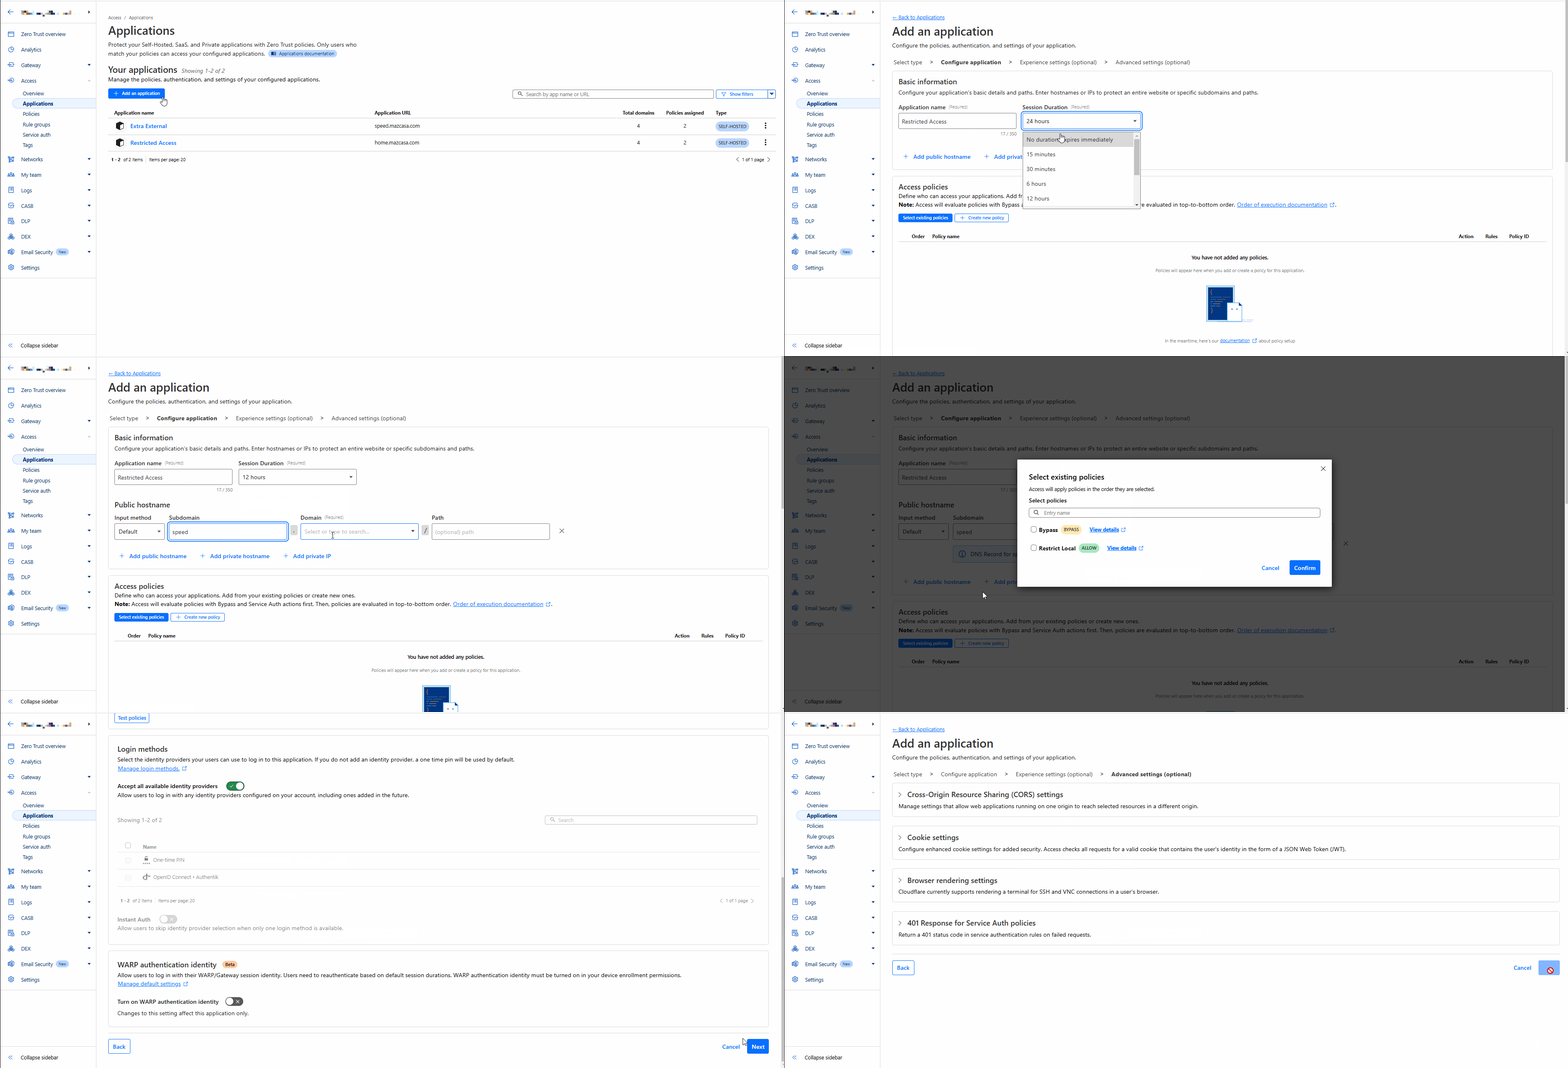
Just like when you configured a public hostname for your tunnels, we're now telling Cloudflare which of your existing web addresses (your hostname) this access policy will apply to. Importantly, we're also defining the access policy itself. This policy acts as a set of rules that strictly controls how people can interact with your application. It will only permit access using the specific methods that we have already outlined in the policies section.
Testing
Now we have our application in place and tied to our access policy if we navigate to https://speed.mywebsite.com we should be prompted to provide our email that we set in our policy.
One caveat to mention is that if you try to navigate to the website it may not enforce the access policy and just allow you access. If this happens it does not mean your policy is incorrect, we just need to clear our browsers cache and cookies to reflect this new change.
Now that I've cleared my cache and cookies I get presented with the below:
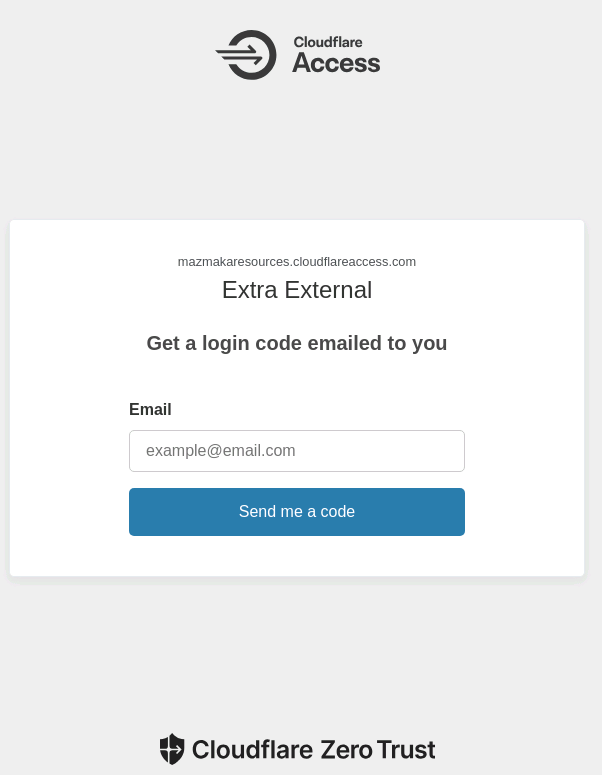
If I enter my email address I'll receive a one time passcode which I'll be prompted to enter and gain access into my application which in this instance is the Speedtest tracker we previously setup.
Summary
So, we've basically told Cloudflare, "Only my email address is allowed to see this specific website address, which is speed.mywebsite.com." We did this by creating a rule that lists my email and then connected that rule to the speed.mywebsite.com address.
Now, only I can get in! This shows you how you can control exactly who can access your internal applications, even when you're accessing them remotely through a Cloudflare Tunnel. By using policies and applications in Cloudflare Access, you can create a secure way to reach your services without the complexity of traditional methods.
This example with email is just one way to control access – Cloudflare Access offers many other ways to verify users, which we might explore in future articles. The key takeaway is that you now have a much more secure way to access your home services remotely, knowing that only authorized individuals can get through.
Access by IP?
Now that's great and all, but what if I primarily use these links from my home network and don't want to have to verify by email address each time?
We can use IP address ranges. Think of it as telling Cloudflare, "If the request is coming from my home internet address, it's okay to skip the email check."
So, when you're at home, you'll be able to get straight to what you need without any extra verification steps, regardless of the access policies. But when you're away from home, you'll still have the protection of our Cloudflare access policies, ensuring your applications remain secure.
This can be implemented within the rules of our access policy simply by selecting Add Include and IP ranges.
In my next article we'll look to focus on further securing our applications with the likes of Authentik and I'll provide my solution to automatically updating our IP address so there's no need to manually update your IP address each time.
Resources
 goauthentik
 Mint
Mint
 henrywhitaker3